NuGet packages to DevOps artifact feed
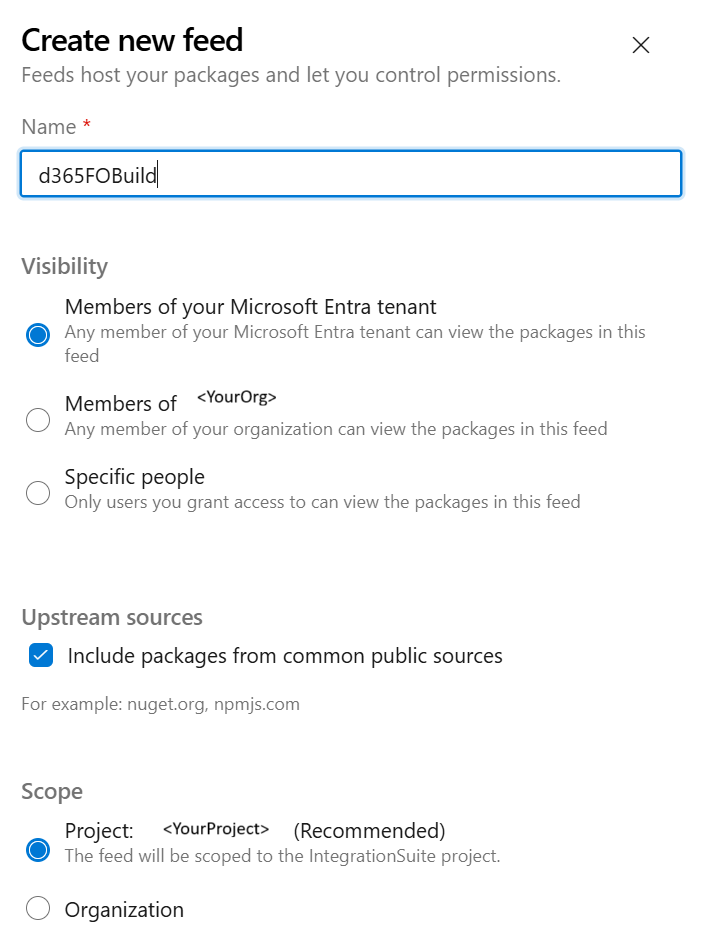
Create feed
Navigate to DevOps and Artefacts, create a feed, this should be scoped for your project and not the Organization. I will use "d365FOBuild" as name for my feed in this article.
Back at the Artefacts page, select the newly created feed and click the Connect to feed. Select NuGet.exe from the list.
Create a nuget.config file and paste the XML, it will look something like this:

*<YourOrg>, <YourProject> and d365FOBuild needs to be replaced with your actual values
Repos
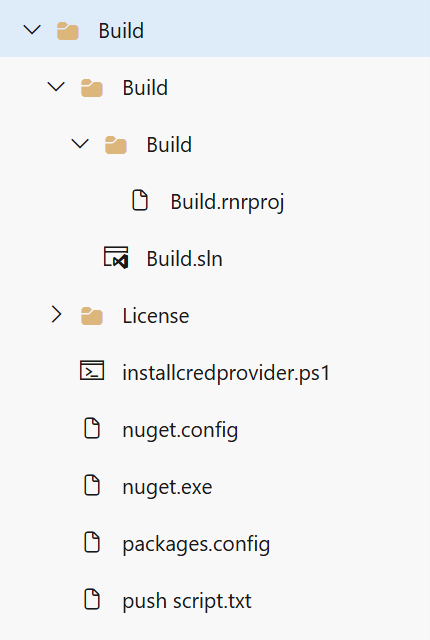
Create a folder in your repos that will contain all the setup and configs for the build pipeline. This should contain
- Build project
- License folder to handle ISV licenses - if applicable
- NuGet config files
- nuget.config
- packages.config
I've also included installcredprovider.ps1, nuget.exe and push script.txt, these are not necessary but prevents you from having to download them each time they are needed.
Create Personal Access Token
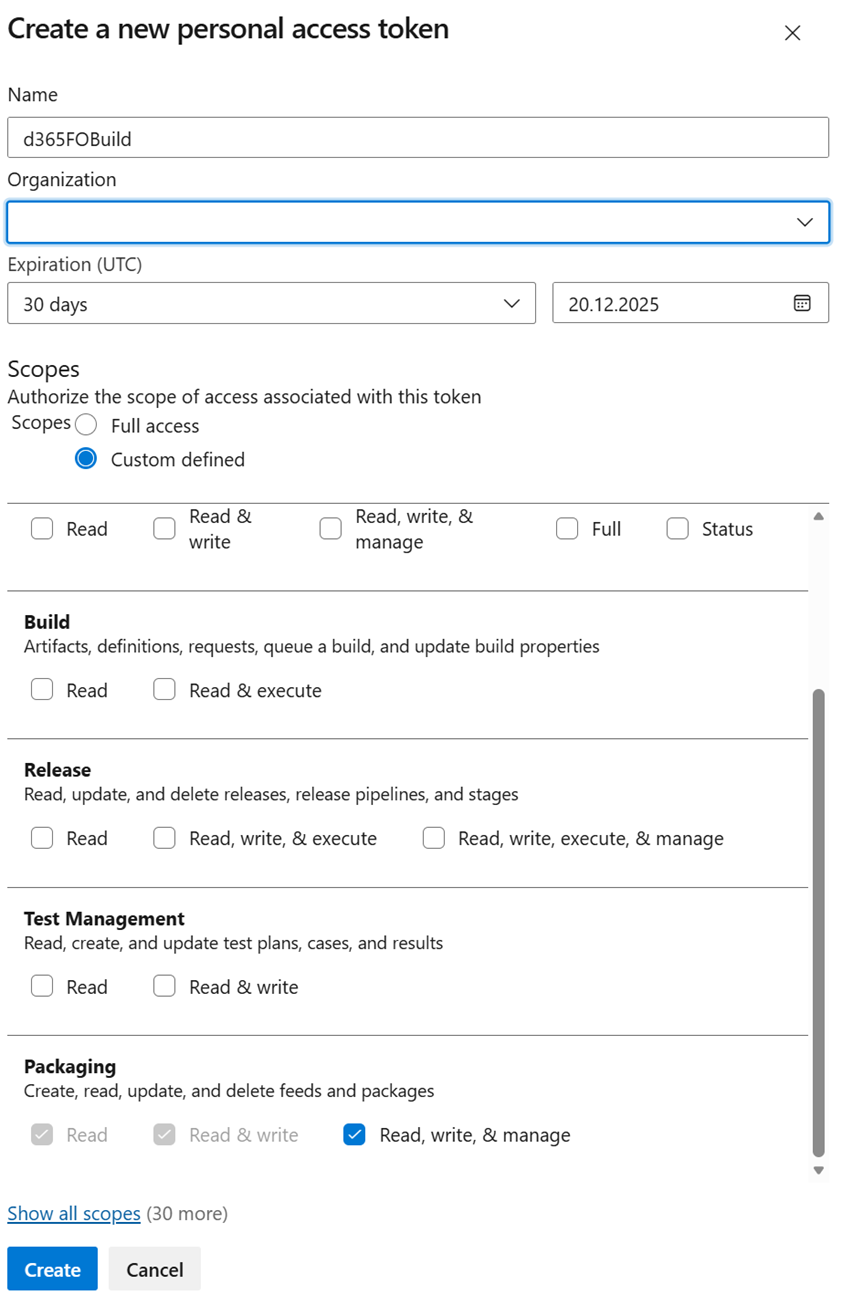
Create a new Personal Access Token (PAT) for accessing the feed. This is done from the user settings in DevOps. Select the packaging permissions to upload the packages. Copy the PAT for later use.
Install d365FO.tools
Open Windows PowerShell (elevated) and run the following commands
Install-Module -Name d365fo.tools
Invoke-D365InstallNuget

NuGet will be installed under the default path C:\Temp\d365fo.tools\nuget.
To register the source we need the PAT and the Azure DevOps artifact feed URL.
cd "C:\Temp\d365fo.tools\NuGet"
.\nuget sources add -Name "d365FOBuild " -Source "https://pkgs.dev.azure.com/<YourOrg>/<YourProject>/_packaging/d365FOBuild/nuget/v3/index.json" -username "<email>" -password "<PAT>"
*<YourOrg>, <YourProject>, <email>, <PAT> and d365FOBuild needs to be replaced with your actual values.
Navigate to %AppData%\NuGet\ in explorer and verify that the NuGet.Config file has been created and contains the reference to d365FOBuild with the correct url and username and password.
Publish packages
Download the NuGet packages from the asset library in LCS and copy or move them to the C:\Temp\d365fo.tools\nuget folder.
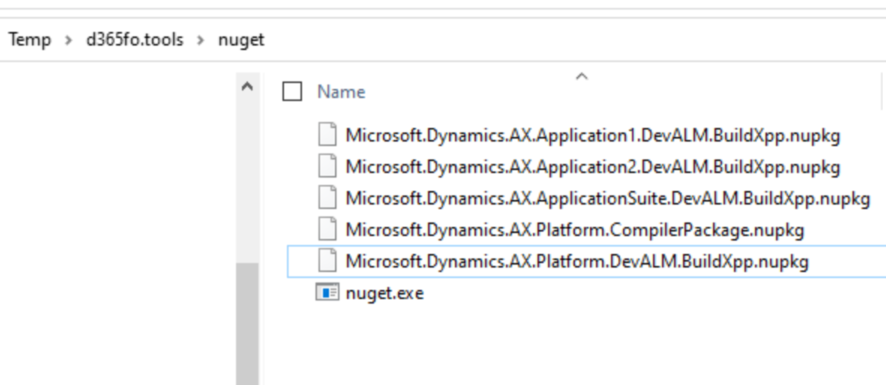
In the PowerShell window you can now run the following commands to push the packages.
Invoke-D365AzureDevOpsNugetPush -Path "microsoft.dynamics.AX.Platform.CompilerPackage.nupkg" -Source "d365FOBuild" -ShowOriginalProgress
Invoke-D365AzureDevOpsNugetPush -Path "microsoft.dynamics.AX.Platform.DevALM.BuildXpp.nupkg" -Source "d365FOBuild" -ShowOriginalProgress
Invoke-D365AzureDevOpsNugetPush -Path "microsoft.dynamics.AX.Application1.DevALM.BuildXpp.nupkg" -Source "d365FOBuild" -ShowOriginalProgress
Invoke-D365AzureDevOpsNugetPush -Path "microsoft.dynamics.AX.Application2.DevALM.BuildXpp.nupkg" -Source "d365FOBuild" -ShowOriginalProgress
Invoke-D365AzureDevOpsNugetPush -Path "Microsoft.Dynamics.AX.ApplicationSuite.DevALM.BuildXpp.nupkg" -Source "d365FOBuild" -ShowOriginalProgress
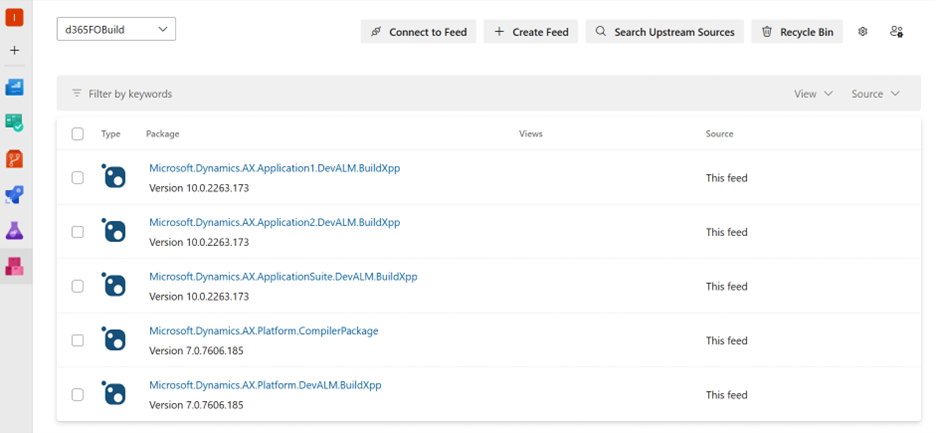
The result of your effort should be something like this:
Tips
Keep in mind to perform the upload from a computer with fast upload speed or it can result in a timeout error.
Alternative solution
Another option, with less steps is to use the installcredprovider.ps1 script and cmd to push the packages.
Open win_ps_ise and run the script
.\installcredprovider.ps1 -AddNetfx
Publish packages
Use CMD in elevated mode in the folder where nuget.exe is installed and the packages are located.
run the following scripts:
nuget.exe push -Source "d365FOBuild" -ApiKey az microsoft.dynamics.AX.Platform.CompilerPackage.nupkg
nuget.exe push -Source "d365FOBuild" -ApiKey az microsoft.dynamics.AX.Platform.DevALM.BuildXpp.nupkg
nuget.exe push -Source "d365FOBuild" -ApiKey az microsoft.dynamics.AX.Application1.DevALM.BuildXpp.nupkg
nuget.exe push -Source "d365FOBuild" -ApiKey az microsoft.dynamics.AX.Application2.DevALM.BuildXpp.nupkg
nuget.exe push -Source "d365FOBuild" -ApiKey az Microsoft.Dynamics.AX.ApplicationSuite.DevALM.BuildXpp.nupkg
